Land Rover Defender Maintenance Guide (Classic and L663 Models)
A complete Land Rover Defender maintenance guide covering Classic models (1983–2016) and the modern L663 (2020–present). Packed with real owner tips on servicing, rust prevention, drivetrain care, and DIY upkeep to keep your Defender in top shape
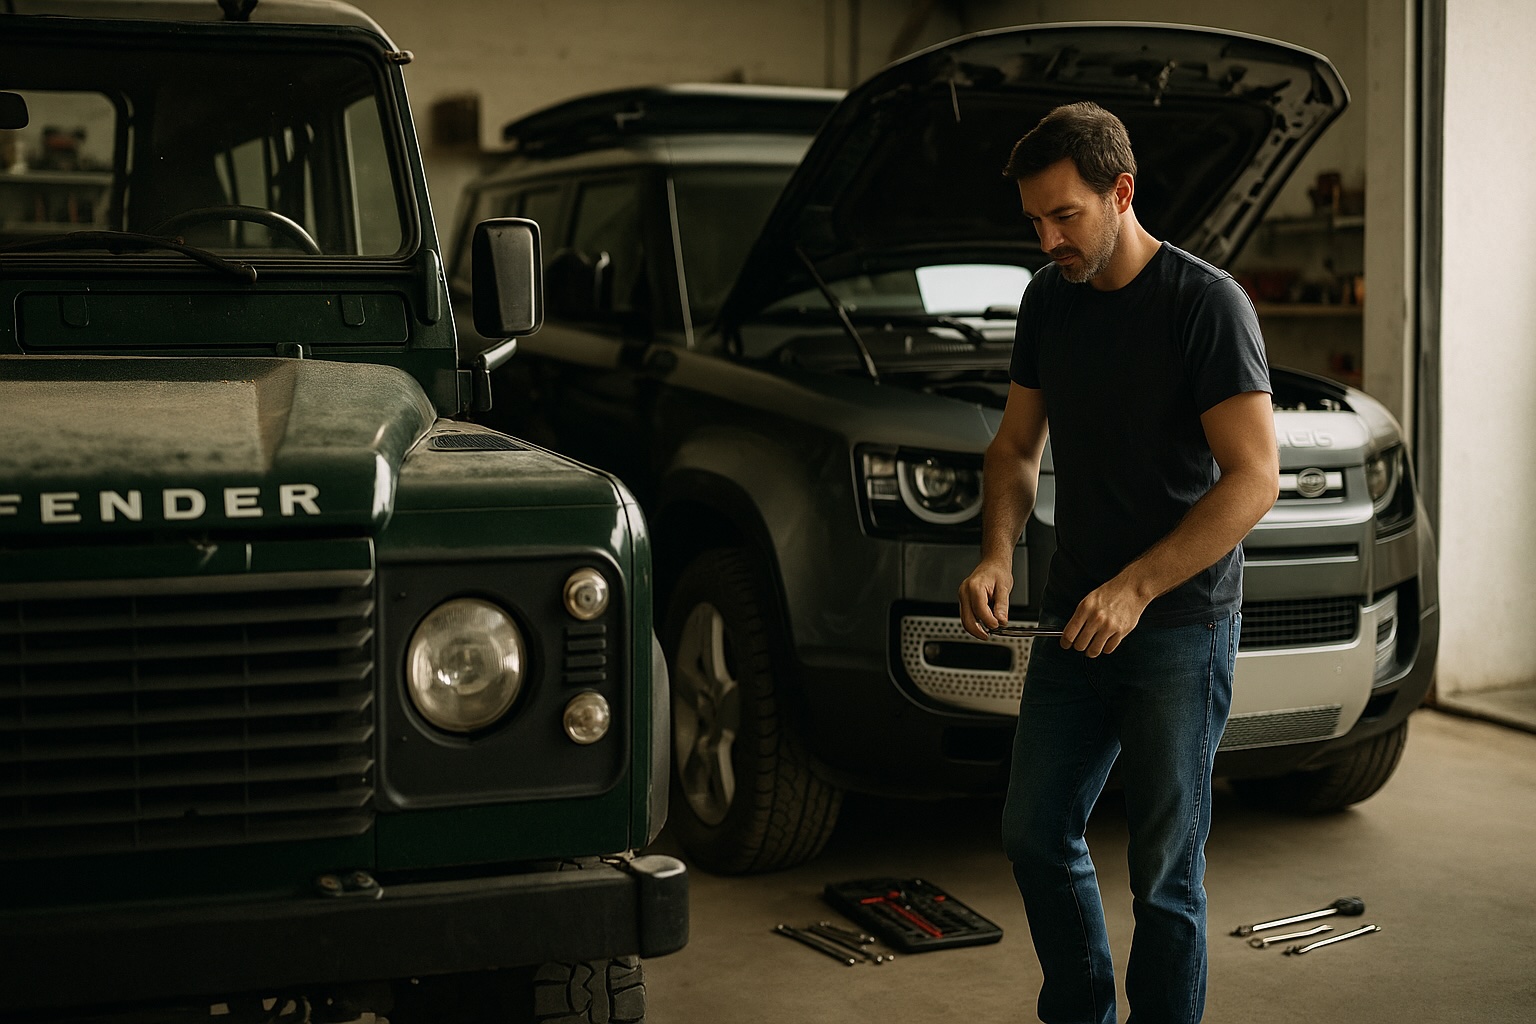
Maintaining a Land Rover Defender is as much about passion and diligence as it is about mechanical know-how. Below, we break down maintenance guidance into two sections: Classic Defenders (1983-2016) - covering the beloved 90/110/130 models with Tdi, TD5, and Puma (TDCi) engines - and the Modern Defender L663 (2020-present).
Each section provides practical, hands-on advice gleaned from veteran owners and mechanics. The tone here is warm, confident, and down-to-earth - just like the Defender community. Whether you’re turning wrenches in your garage or collaborating with a trusted shop, this guide will help you care for your Defender long-term.
(If you’re still in the market for one, our guide to buying a Defender will help.)
Classic Defenders (1983-2016)
Classic Defenders require regular TLC to stay reliable. They have a reputation for rugged simplicity, which means many Defender problems are user-solvable and DIY-friendly, but also that consistent upkeep is needed.
Below are some key maintenance areas, service intervals, and tips for classic models (from early 200Tdi diesels through TD5 and Puma years).
Regular Service Intervals & Routine Checks
Sticking to a maintenance schedule is vital for classic Defenders. Many seasoned owners recommend more frequent servicing than the old factory intervals, aiming for oil changes and basic checks about every 6,000 miles (10,000 km) or 6-12 months, whichever comes first . In practice, this often means an annual service at minimum, with additional interim oil changes if you drive hard or frequently off-road. Key routine service points include:
Engine Oil & Filter: Change at least every 5,000-7,000 miles (or yearly). Fresh oil is the “lifeblood” of your Defender’s engine; regular changes keep it running smoothly . Many owners of Tdi and TD5 models actually change oil around the 6k mile mark for peace of mind , even though Land Rover once allowed up to ~12k miles. Always use high-quality oil of the grade specified (and a genuine or OEM filter). This maintains lubrication for that distinctive Defender diesel rattle and prevents premature wear .
Other Fluids: At every oil service, also check and top up all fluids - coolant, brake fluid, clutch fluid, power steering fluid, and axle/gearbox oils . A quick look for proper levels and any signs of leaks should be part of your routine. Every 12 months or 10,000 km, many owners will do a more comprehensive fluid check and service: for example, renewing the fuel filter and air filter, and flushing brake/clutch fluids annually to keep these systems fresh . (Brake fluid attracts moisture over time, so a flush every 2 years at most is wise for safety.)
Greasing & Lubrication: Classic Defenders have multiple grease points. Prop shaft universal joints and slip splines should be greased often - ideally every oil change or every few months . “Whenever you’re bored, roll under and start lubing things” one enthusiast quipped . A grease gun and a tub of EP90 gear oil are your allies: lubricate U-joints, drive shaft splines, clutch linkages (on older models), throttle/accelerator linkage, and even door and bonnet hinges periodically. This routine keeps the driveline smooth and prevents seizures or excess wear .
Basic Checks: Make it a habit to perform a walk-around inspection monthly or before long trips. Check all lights, wipers, and electrics, inspect tires for proper pressure and tread (including the spare), and look underneath for any fresh fluid drips or anything hanging loose. Catching a minor issue (a seeping gasket, a frayed belt, a loose shock mount, etc.) before it escalates will save headaches . Many owners will “waggle stuff to check for play” whenever the truck is on jack stands - for example, give the steering track rod a shake, check wheel bearings for play, and ensure suspension bushes aren’t excessively worn. Early detection is key: if you spot a leak, odd noise, or rust patch developing, address it sooner rather than later.
Comprehensive Services: Along with the frequent minor services above, follow through on major service milestones. For example, every 20,000 km (~12,000 miles) do a thorough drivetrain service: change the gearbox and transfer case oils, and the front/rear differential oils (or at least check their condition) . Also at this interval, inspect and repack wheel bearings (if applicable) and check/adjust the swivel pin housings. Every 60,000 km (~37,000 miles), there are bigger-ticket items: on 200Tdi/300Tdi engines, renew the timing belt at ~60k km or 5-year intervals to prevent belt failure , and take the opportunity to flush the cooling system and intercooler . (TD5 and Puma engines use timing chains, but timing chains generally last much longer; just maintain good oil changes for chain health.) Always refer to a maintenance checklist - many community members use the official schedule or club “cheat sheets” that list service items at 6-month, 12-month, and multi-year intervals .
In short, regular maintenance is the bedrock of Defender durability . Following a strict service regimen - oil, filters, fluids, and inspections on schedule - keeps your classic’s engine and driveline healthy and lets you catch issues early . The Defender thrives on this proactive approach.
DIY-Friendly Maintenance Tasks
One of the joys of a classic Defender is that it invites hands-on ownership. Many routine jobs are DIY-friendly with basic tools and a bit of patience. Here are tasks most owners tackle at home, along with tips gathered from the community:
Oil & Filter Changes: As mentioned, engine oil changes are straightforward on older Defenders - the sump plug and filter are easily accessible (especially on Tdi engines). Ensure the vehicle is safely supported, and have a large drain pan ready (these diesels have ~6-7 liters of oil). Tip: warm the engine up first so the oil drains more completely. Replace the copper crush washer on the drain plug to prevent drips. The TD5 engine has two oil filters (a screw-on canister and a centrifugal rotor filter) - replace both at service . Always prime the new filter with a bit of oil and lubricate its seal, and don’t over-tighten it. Dispose of used oil responsibly. This task is messy but very doable in your driveway and much cheaper than paying a shop.
Fuel and Air Filters: Replacing the fuel filter (typically mounted on the chassis or bulkhead) is a quick job - just be prepared to bleed the fuel system afterward on diesel models. Many owners renew the fuel filter annually or every ~10k miles . The air filter should be inspected frequently - in dusty/off-road use, clean or replace it often (carry a spare on long trips). At minimum, replace the air filter every 12 months or 2 services . It’s usually a simple wing-nut or clip-secured airbox on classics. A clogged air filter kills performance, so keep it clean (you can knock out dust or use compressed air gently from inside out between replacements).
Lubrication & Greasing: As noted, greasing prop shafts (drive shafts) is a quintessential DIY task. You’ll find grease nipples on the U-joints at each end of the front and rear props, and on the sliding spline section. Pump fresh grease until you see old grease oozing out of the caps or slip joint - that ensures any water or grit is purged. Do this at least every 6-12 months , or after deep wading and heavy off-roading. A manual grease gun is inexpensive and indispensable for Defender ownership. Other lube points: door hinges and latch mechanisms (a squirt of spray lubricant keeps them from seizing or squeaking), throttle linkage cam (on older diesels, a dab of grease where the cable/linkage pivots), and the bonnet release latch. Also remember to oil your door locks and check door seals occasionally - it keeps water out and doors functioning nicely.
Basic Tune-Up (Tdi models): The 200Tdi/300Tdi engines are old-school and benefit from occasional “tune-ups.” This can include checking valve clearances every 12k miles or so (especially on 200/300Tdi which have adjustable tappets) . This is a moderate DIY job: you’ll remove the rocker cover and use feeler gauges to adjust each valve clearance to spec (usually done with engine cold). Another item is the diesel sedimenter (if fitted on older models) - it’s a fuel system water trap located near the rear crossmember. It should be drained of water and sediment every 6 months or 5k km (open the drain plug and let out any water). Cleaning it annually helps prevent fuel blockages.
Brake Pads and Routine Braking System Checks: Many Defender owners handle their own brake pad changes, as the design is relatively simple (especially front discs on later models). If you’re comfortable, you can unbolt the caliper, swap pads, and bleed brakes yourself. Always observe proper safety (axle stands, etc.). It’s wise to also flush brake fluid every two years to maintain braking performance - brake fluid absorbs moisture which can corrode components and lower the boiling point. Use DOT4 fluid as specified. If you notice spongy brakes or a long pedal travel, inspect the system or seek professional help if uncertain - brakes are critical.
Coolant Checks and Cooling System: Keeping the Tdi, TD5, or Puma engine cool is vital. Regularly check coolant level in the expansion tank (when cold) and top up with the correct mix of antifreeze and water. Every couple of years, plan a coolant flush - drain the radiator and engine block, refill with fresh coolant . On TD5/Puma engines, make sure to bleed any air out after refilling (there are bleed screws on the thermostat housing or radiator - many owners replace these brittle plastic bleed screws with brass ones for reliability ). Watch for any coolant leaks around hoses and the radiator. Replacing coolant hoses periodically is cheap insurance; inspect them for cracks or soft spots and renew any aging hoses. Upgrading to silicone hoses is popular for durability .
Electrical Maintenance: Basic electrical upkeep on classics can be handled at home. This includes cleaning battery terminals and ensuring the battery is secure and fully charged (especially if the vehicle sits for long periods) . A sluggish start could mean corroded terminals or a weakening battery - clean and tighten connections or replace the battery if needed (every ~5 years is typical). Also, regularly check all lights and fuses. The Defender’s electrical system is simple but prone to corrosion at bullet connectors and ground points. DIY tasks like replacing burned-out bulbs, cleaning ground strap connections (e.g. battery ground to chassis, engine ground strap), and applying dielectric grease to connectors can prevent many annoying electrical gremlins. Keep an eye on the alternator belt condition and tension; if you hear squealing, it might be loose or glazed - a quick adjustment or replacement of the auxiliary belt is within DIY scope (just note the routing). Owners of TD5 models should also know about the injector harness oil issue: oil can wick from the engine into the injector wiring loom and ECU plug over time. The fix is to replace the injector harness every couple of years as a service item - it’s a modest-cost part and a straightforward swap under the rocker cover, which can save you from intermittent misfires or ECU oil contamination.
Body & Interior Care: Simple preservation tasks can be done by any owner. Keep door and window seals clean and conditioned (wipe them with silicone-based protectant) to prevent leaks and draughts. If your Defender sees rain (or water crossings), periodically lift the carpets or floor mats and ensure no moisture is trapped against the floor plates - this prevents floor panel rust. Lubricate door check straps and locks so they operate smoothly. Tighten any loose interior screws or seat bolts to stop rattles. Cleaning the interior is of course personal preference, but mud and moisture are common in Defenders - vacuum out mud and grit that can cause abrasion on surfaces, and consider using rubber mats or seat covers when off-roading to protect the original interior. Little steps like these keep the truck’s utilitarian interior in good shape over the years.
Overall, a mechanically-inclined owner can tackle a large portion of Defender maintenance. Always consult a workshop manual or community forums for step-by-step guidance if you’re new to a task - the Defender community is very supportive and has documented most procedures. With basic tools (sockets, wrenches, screwdrivers, a torque wrench, a grease gun, etc.) you can handle the majority of routine maintenance and small repairs on a classic Defender in your home garage.
Tasks Best Left to Professionals (and Why)
While Defenders are DIY-friendly, some jobs are best entrusted to experienced mechanics or specialist workshops - either due to their complexity, the need for special tools, or safety considerations. Here are a few examples of tasks better left to the pros, along with the reasons:
Major Engine Work & Timing Belt Changes: If your 200Tdi/300Tdi is due for a timing belt replacement or your TD5 needs head gasket work, these procedures require precise timing and specialized tools (like locking pins for the camshaft/injection pump). A mistake in timing belt installation can destroy the engine, so if you’re not completely confident, let a Land Rover specialist handle it. The same goes for major internal engine repairs or injector pump tuning - these engines are robust but finely tuned, and an expert touch can save a lot of grief.
Clutch Replacement and Transmission Repairs: Changing a clutch on a Defender (especially the heavy-duty clutch in a TD5 or Puma) typically means removing either the gearbox/transfer case or the engine. It’s a heavy, awkward job that often requires a transmission jack or lift. A professional shop can handle this in a day with the right equipment, whereas it can turn into a weekend (or longer) project for a DIYer on the ground. Likewise, rebuilding a gearbox or transfer case (syncros, gears, bearings) is specialist work - best done by a reputable transmission shop. If you have a crunchy LT77/R380 gearbox or a whining transfer case, consider sourcing a rebuilt unit or hiring a pro rather than DIY, unless you have advanced skills.
Advanced Electrical Diagnostics: While basic electrical fixes are DIY, complex electrical faults (like chasing an intermittent short, ECU issues on TD5/Puma, or rewiring parts of a loom) can be frustrating without the right diagnostic tools. Professional mechanics have diagnostic computers (e.g. TestBook, Nanocom, etc. for Land Rovers) that can read fault codes and live data on later models. They can pinpoint issues like a faulty ABS sensor or immobilizer problem much faster. If your Defender has a persistent electrical issue that simple fixes haven’t solved, a specialist with proper diagnostics might be worth it to avoid endless trial-and-error part swapping.
Brake System Overhaul: Replacing a brake master cylinder, vacuum booster, or doing a complete brake line replacement and bleed is doable at home, but brakes are obviously a safety-critical system. If you’re not 100% sure in your brake servicing skills, it’s wise to have a professional handle jobs like brake caliper rebuilds, brake pipe flaring/replacement, or ABS modulator issues (for those few late models that had ABS). Professionals will ensure no air is in the system and that everything is adjusted correctly so your Defender stops as it should.
Suspension Geometry & Alignments: Defenders have rugged suspension, but things like setting the steering wheel alignment (toe adjustment) or checking caster angles after a lift kit are often easier with professional alignment tools. A shop alignment ensures your Defender tracks straight and doesn’t eat up tires. Similarly, pressing in new suspension bushings (like the A-frame ball joint or control arm bushes) may require hydraulic press tools - many owners remove the parts and still bring them to a workshop to press the new bushes in.
Rust Repair & Welding: Rust is a reality on classic Defenders. Patching a chassis outrigger or footwell often involves cutting and welding new metal. Unless you are an experienced welder, structural rust repairs should be handled by a professional who can weld safely and strongly . A bad weld on a chassis can be dangerous. Professionals can also properly treat and paint the repaired area. Consider using shops that are familiar with Land Rover chassis restorations if major rust surgery is needed (e.g. rear crossmember replacement or bulkhead restoration).
Paintwork & Body Restoration: Bodywork on the Defender (such as repainting panels, repairing aluminum corrosion, or straightening the body after an impact) is best done by professionals with the right facilities. Aluminum body panels require different techniques than steel. A pro will ensure good prep, use etch primers where needed, and match paint correctly. They’ll also properly seal and rivet panels as per original. If you attempt DIY body repairs without experience, you might end up with leaky windows or misaligned doors - so when it comes to the Defender’s body and paint, don’t hesitate to use a specialist if you want a lasting, good-looking result.
Remember, there’s no shame in turning to professionals for certain tasks. A good Land Rover mechanic or workshop can be a Defender owner’s best friend, helping with jobs that are outside your comfort zone. Many owners strike a balance: handle the easy stuff yourself, and rely on pros for the heavy-duty or highly technical work. This approach keeps maintenance enjoyable and ensures critical jobs are done right. It’s also worth noting that some Defender specialists allow you to supply parts (OEM quality) and will simply charge labor - this can save cost while still getting expert service.
Preventative Maintenance & Common Trouble Spots
Preventative maintenance is all about anticipating issues before they leave you stranded. Defenders, especially classics, have known quirks and weak points that experienced owners address proactively. Here are some top preventative maintenance tips drawn from community wisdom:
Rust Proofing the Chassis and Bulkhead: Arguably the most important preventative task on any classic Defender is combating rust. The steel chassis, bulkhead (firewall), and door frames are prone to corrosion if not protected. Owners regularly inspect and treat any rust on the frame and body . At least once a year (often at the end of summer before winter salt season), give the chassis a thorough clean and consider applying a rust-inhibiting wax or oil. Popular methods include cavity waxing the inside of frame rails and doors with products like Dinitrol or Waxoyl . Ensure the metal is dry and any loose rust is removed or converted before application . Many DIYers do this in their driveway with aerosol wands, but you can also have it done professionally (some shops specialize in Defender underseal treatments). Don’t forget the bulkhead corners, door sills, and door bottoms - spray inside any accessible holes. Apply ACF-50 (a thin anti-corrosion oil) on exposed metal fittings and in engine bay crevices; forum members swear by ACF-50 for stopping surface rust on hinges, brackets, and electrical connectors . Making rust proofing a routine (e.g. touch-ups twice a year) will significantly slow down the tin worm and preserve your Defender’s structural integrity .
Driveline Preservation: Classic Defenders have hardy drivetrains, but some components need special attention to prevent costly failures. One known issue on TD5 models is the oil pump bolt - on early TD5 engines, the bolt securing the oil pump sprocket inside the engine can loosen over high mileage, which can lead to sudden oil pressure loss (catastrophic for the engine). Many TD5 owners proactively have this bolt checked and secured with thread-lock at the 100k mile mark or sooner . It’s an involved job (requires dropping the oil sump), but as one veteran said, “If I had a TD5 I’d fit the upgraded bolt pronto” - cheap insurance against engine failure. Puma (TDCi) models (2007-2016) have a known weakness in the MT82 gearbox output shaft (the spline coupling between gearbox and transfer case). The spline can wear out, typically after ~60-100k km, leading to a sudden loss of drive. As preventative maintenance, many owners upgrade this to an improved one-piece shaft (Ashcroft or LOF kits) when doing the clutch . If you have a Puma and the driveline has slack or “clunk”, consider the output shaft upgrade before it strands you. Drive flanges (at the wheel hubs) are another wear point - their splines wear with mileage. Checking and greasing the drive flange splines or upgrading to heavy-duty flanges (which are inexpensive) can prevent the “dreaded click” or loss of drive in a half-shaft.
Fluids, Fluids, Fluids: A core preventative strategy is to change all fluids more often than the minimum. This means engine oil (as discussed), but also gearbox, transfer case, and diff oils. For example, instead of waiting 4-5 years/40k+ miles, many owners will change gearbox and transfer case oil every ~20,000 miles and axle oils every 1-2 years, especially if the vehicle sees water crossings or heavy towing . Fresh gear oil keeps the transmission shifting smoothly (important for the R380 5-speed) and helps spot any concerning metal particles early. Brake and clutch fluids should be flushed every two years; don’t wait for them to turn dark. Coolant - use the correct spec antifreeze and flush it every 2-3 years to prevent internal corrosion of the radiator and heater core . Regular fluid changes are cheap insurance and help critical components (engine bearings, gearbox syncros, differential gears) last as long as possible.
Hoses, Belts, and Seals: Prevent leaks and breakdowns by periodically renewing wear items. Rubber coolant hoses and fuel hoses on older Defenders can crack or swell with age - examine them at every service and replace any that look suspect (carry spares on expeditions). Consider upgrading to silicone coolant hoses which last longer and resist heat . The serpentine/drive belt (on TD5 and Puma engines) or V-belts (on Tdi) should be inspected for cracks and replaced proactively (usually every few years). A broken belt can leave you without charging or cooling. Keep a spare belt in the vehicle. Common oil leak points like the rear main seal, transfer case input seal, or diff pinion seals may start seeping after many years - while not immediate emergencies, plan to renew those seals during related major work (e.g. clutch job or when changing a differential) to avoid bigger messes. Also, check the sedimenter and fuel tank for algae or debris if you often use bio-diesel or the vehicle sits - cleaning them can prevent fuel starvation issues.
Electrical Preventatives: Apply dielectric grease or anti-corrosion spray (like ACF-50) to critical electrical connectors and ground points. Classic Defenders’ electrical gremlins often come down to corroded connections. For instance, bullet connectors for lighting in the front wings and rear tub can corrode - cleaning and greasing them each year keeps the lights reliable. Ensure the main battery-to-chassis ground is clean (remove, sand the contact surface, refasten). If you have a TD5, as mentioned, replace the injector harness every ~2-3 years to stay ahead of the oil-in-loom issue. Also consider preventative replacement of relays if you have original ones decades old (e.g. the fuel pump relay on TD5, starter relay, glow plug relay) - relays are cheap and can save troubleshooting later.
Rustproofing Continued: Beyond the chassis, don’t forget to protect the bulkhead and doors. For example, spray wax or oil inside the bulkhead via the vents or access holes (many owners remove the interior dash end panels or use existing holes to flood the bulkhead with wax). The bulkhead is a notorious rust spot, especially around the air intake flaps and door hinges - keep those areas coated. Doors: spray inside doors through the drain holes with cavity wax. Pay attention to the door frame bottoms where steel meets aluminum skin (to stave off electrolytic corrosion). One forum guide even suggests removing the roof gutter trim and sealing under it to prevent water from creeping in and rusting the roof edge - an advanced but effective preventative step . And remember, wash the undercarriage after off-roading or winter salt - mud and salt accumulation are rust accelerators. A clean chassis lasts longer.
Preventative maintenance might seem like extra work now, but it pays off in the long run. A well-cared-for Defender will reward you with greater reliability and longevity. In the words of one Defender mechanic: “Go over the car regularly for anything worn or in need of replacing, and replace it” - that is the recipe for a trouble-free truck . By addressing known weak points and servicing diligently, you significantly reduce the chance of expensive failures.
Preserving Driveline, Body, Electrics, and Interior
This section compiles tips for preserving all aspects of your classic Defender - from the mechanical bits underneath to the body and cabin that make it an icon.
Driveline & Powertrain: Besides regular fluid changes and greasing, a few habits will prolong your Defender’s powertrain. Warm up the engine before hard use - avoid revving a cold diesel; let oil circulate (but don’t just idle forever, better to drive gently until warm). When off-roading, use low range appropriately to reduce strain on clutch and gearbox. Change gear oils after deep water forays - water ingress in axles or the gearbox can happen if breathers aren’t extended, so if you’ve done a lot of wading, replace those oils. Keep an ear out for new clunks or vibration - e.g. a clunk on takeoff could hint at a worn U-joint or slack in the driveline, which you can fix before it causes collateral damage. Also, use quality fuel and clean the sedimenter (if fitted) to protect the injection pump and injectors on diesels. Many owners add a fuel treatment occasionally to keep injectors clean. For the turbocharged models (Tdi, TD5, Puma), allow the engine to idle for a short period after a hard run or long highway drive - this lets the turbo cool down on oil, which can extend its life. If your model has a timing belt (Tdi), replacing it on schedule is crucial to “preserve” the engine - a snapped belt can be catastrophic, so don’t push your luck on timing belt age.
Body & Chassis: Rust prevention, as detailed earlier, is the main focus here. Keeping the chassis and bulkhead coated is the best way to preserve the “skeleton” of your Defender . Additionally, avoid high-pressure power-washing directly into door seals, vents, and electrical boxes - water can be forced where it shouldn’t go. Instead, rinse gently and use compressed air to blow out crevices. If you live in a wet climate, periodically remove the rubber floor mats and let the interior air out on a dry day - trapped moisture is a body-killer. Preserve the paintwork by touching up chips (especially on aluminum panels, to prevent corrosion creepage under paint). The body cappings (galvanized trim pieces on the tub and windshield) can rust on new paint models - applying some clear coat or wax on them preserves their finish. On the chassis, ensure all drain holes are clear (for example, the chassis has drain holes that should not be clogged by mud, so water can exit). Many owners also install extended breathers on axles and gearboxes (routing them into the engine bay) - this not only helps with wading but also reduces moisture being sucked into those components as they cool down. And remember to periodically check the tightness of body bolts and suspension hardware; the Defender’s rugged ride can loosen things over time, leading to rattles or elongated holes.
Electrical System: For the classic’s electrics, prevention is key. We discussed using ACF-50 or similar on contacts - one owner noted that ACF-50 is great for protecting electrics and metal parts; just don’t get it on belts or pulleys . Another tip: relocate or better seal any vulnerable ECUs (for example, the TD5’s ECU under the seat - ensure the seat box lid seal is good, and some owners even put the ECU in a waterproof case or raise it if they frequently wade in deep water). Regularly inspect the battery and alternator: a slipping alternator belt or failing alternator will give subtle warning signs (dim lights, battery light flicker) - address those immediately to avoid getting stranded with a dead battery. If your Defender has additional accessories (driving lights, winch, etc.), check the wiring looms for chafing - any rubbed-through wire can short and cause trouble; use grommets and loom wrap to protect wires passing through bulkheads. For vehicles with older style glass fuses, carry spares and periodically clean the fuse contacts (or upgrade to blade-style fuse boxes for reliability). In short, keeping connections clean and dry is the secret to preserving the electrics in an old Defender.
Interior & Upholstery: The Defender’s interior is utilitarian but it can last decades if cared for. Key is preventing water ingress - ensure door seals, alpine window seals, and the windshield seal are in good condition. Leaks will lead to rusty floors and moldy upholstery. If you discover wet carpets, dry them out and track down the source (common leak points are the windshield seal, door tops, or heater vent). Treat the vinyl or leather seats with appropriate conditioners so they don’t dry and crack. The dash and interior trim can rattle loose on rough trails; occasionally tighten screws and consider a bit of Loctite on threads that continually loosen. For soft-top models or those with canvas, keep the hood clean and re-proof it with waterproofing treatment each season. If storing the vehicle, consider using moisture absorber packs inside to prevent mildew. Lastly, don’t neglect the heater and vent system: clear any debris from the heater air intake (a mesh or snorkel cover - sometimes called a “snow cowl” - can keep leaves out of the heater intake) and lubricate the heater fan motor bearings if accessible. A little care keeps the classic Defender’s spartan interior functional and comfortable (as much as an old Landy can be!).
Seasonal & Usage-Specific Maintenance
How you use your Defender - and the environment you use it in - will dictate some additional maintenance tasks. Here are tips for off-roading prep and aftermath, winterizing, and other special scenarios:
Off-Roading (Pre and Post-Trip): Before heading off-road, give your Defender a once-over: check fluids, inspect underneath for anything already loose or cracked, and grease up the U-joints and steering swivels (well-greased joints are more water-resistant). If you anticipate deep mud or water, consider temporary wading plugs (older models have threaded holes in the timing cover and bellhousing where you can screw in plugs to keep water out - just remember to remove them after!). After off-roading, a thorough cleanup is mandatory. Mud holds moisture and salt and will rot your chassis and components if left. As one user succinctly put it: “If you’ve been off-road, wash everything underneath and then check it all for damage/wear/lube” . So, hose out the wheel wells, chassis, and underbody. Then inspect the undercarriage: look for new dents in the diffs or skid plates, tears in CV joint gaiters, bent steering rods, etc. Re-grease all nipples (to push out any water that entered) and spray some WD-40 or water dispersant on electrical connectors that may have gotten wet. If you did deep water fording, it’s wise to check all your drivetrain fluids for water contamination (a milky appearance) once you’re back . This includes axles, gearbox, transfer case - water can sneak past seals during submersion. Also inspect the air filter for any dampness if water crossings were bonnet-high ; a wet or muddy air filter should be changed immediately. These post-trail inspections and fluid checks greatly extend the life of your Defender after heavy off-road use.
Winter and Salt Use: Road salt is a Defender’s enemy. In winter, try to rinse the chassis frequently, especially inside wheel arches and the underside, to remove salt. Pay attention to the rear crossmember and bulkhead outrigger areas where salty slush accumulates. It’s common in some regions to do an annual oil spray or Fluid Film application before winter - a thin coating of lanolin-based oil on the undercarriage can prevent salt from contacting metal (some mechanics have “been using Fluid Film on the undersides of Rovers for years” to fight rust). Make sure your heater is working properly before winter - flush the heater core if heating is weak, and check the blower fan. Also check (and possibly replace) your wiper blades and keep washer fluid topped up with winter-grade solution. Door locks can freeze; a little silicone spray or graphite in the locks and on door seals keeps them from sticking. Another tip: lightly grease the battery terminals and consider using a trickle charger or battery maintainer if the vehicle sits in cold weather - batteries lose efficiency in the cold, and the Defender needs a strong crank. For diesel models in very cold climates, ensure you have winter-grade diesel (or use additives) to prevent gelling, and check your glow plugs are all functioning for easy starting. Finally, if you drive in deep snow, clean out packed snow from the undercarriage afterwards - snow packed around the prop shaft or in the wheels can melt and refreeze in undesirable ways.
Storage & Occasional Use: If you only use your Defender seasonally or for special trips, how you store it is key. When storing, fill up the fuel tank (to minimize condensation), consider using a fuel stabilizer, and disconnect or trickle-charge the battery. Ideally, take it for a spin at least once a month to circulate oils and charge the battery. If storing longer, overinflate tires by ~5-10 psi to reduce flat-spotting (or better, put it on jack stands to relieve weight). Mothball critter protection - rodents love Defenders, so plug the air intake and exhaust and set traps or deterrents around the vehicle. Upon taking it out of storage, do a thorough check of fluid levels, tire pressures, and look for any leaks under where it was parked (a clue if something’s weeping).
Towing and Heavy Use: If you use your Defender to tow or carry heavy loads regularly, you’ll want to be extra vigilant on driveline maintenance. Heavy use means shorter service intervals - e.g. oil changes a bit sooner, and more frequent checks on clutch adjustment (for older models) or drivetrain backlash. Towing puts stress on gearbox and diffs, so consider changing those oils more often. Also keep an eye on the cooling system when towing - an auxiliary transmission cooler or bigger radiator is an upgrade some make for heavy towing in hot climates. At the very least, ensure your radiator is clean (external fins free of mud/debris) and coolant is fresh if you’re working the engine hard.
Each type of use has its own demands, but the overarching principle is: inspect and adjust your maintenance routine based on how and where you use the vehicle. The Defender can be reliable in harsh use, as long as you give it the care it needs for that context.
Recommended Tools, Spare Parts, and Upgrades (Community Consensus)
Owning a Defender practically means owning a toolkit - or as the joke goes, “Defender tools and parts will become part of your decor.” Here are some tools and spares many owners recommend keeping on hand, as well as popular upgrades that improve reliability or ease maintenance:
Essential Tools for Maintenance:
Comprehensive Socket Set: A quality socket/spanner set (primarily metric, with a few imperial sizes for older models) is a must. Owners often recommend a 1/2” drive set for larger suspension bolts and a 3/8” or 1/4” set for smaller jobs. Notably, get a 52 mm hub socket - needed for wheel bearings on classic Defenders . A propshaft 9/16” socket or special slim prop shaft tool is also extremely handy for undoing the prop shaft flange bolts without skinning your knuckles . Many have done without it, but those who have it say it “saves loads of knuckles” .
Grease Gun: As emphasized, a grease gun is essential for driveline maintenance . A decent hand-pump grease gun loaded with EP2 grease will cover U-joints, swivel pins (if greased type), and more. Grease regularly!
Torque Wrenches: One mid-range and one larger torque wrench will help you tighten critical bolts to spec - e.g. wheel lug nuts, hub nuts, suspension components. Community members often stress using a torque wrench, especially on alloy wheels and engine components, to avoid under or over-tightening .
Breaker Bar and Hammer: Sometimes bolts are stubborn. A long breaker bar (or strong length of pipe) and a heavy hammer (“BFH” - Big Friendly Hammer) are part of the Defender toolkit . For instance, that 52mm hub nut often needs some persuasion. Penetrating fluid (like PB Blaster or WD-40) is also a workshop staple for breaking loose rusted nuts.
Pliers and Specialty Tools: Circlip pliers are needed for jobs like CV joint clips or gearbox internals . A set of screwdrivers, including heavy-duty flat heads that can pry, is useful. Carry vice grips and adjustable wrenches for roadside fixes. A 14mm ratchet spanner is notably helpful for swivel pin housing bolts (a tip from an owner: it fits well and speeds up that job). Also, a pry bar or crowbar helps with things like aligning bolt holes or persuading spring packs.
Fluid Tools: To do fluid changes neatly, get a fluid pump or oil transfer syringe for filling gearboxes, diffs, etc. A simple hand pump that attaches to oil bottles will save you mess and effort when refilling through awkward fill plugs. Also keep a decent funnel for coolant or fuel top-ups.
Jack and Stands: The factory bottle jack works but is tedious. Many upgrade to a high-capacity hydraulic jack or carry a Hi-Lift (if trained to use it) for off-road. In the garage, a sturdy floor jack and jack stands are required for safety when working underneath. Never rely on a jack alone.
Diagnostic Tool (for TD5/Puma): If you have a TD5 or later model with electronics, investing in a diagnostic scanner (such as a Nanocom or Lynx) can be immensely helpful. It allows you to read fault codes, program keys, and generally talk to the vehicle’s ECU - empowering you to troubleshoot issues that would otherwise require a dealer.
On-Trail Kit: Many keep a trail kit in the Defender: this often includes a basic toolkit (covering common bolt sizes: 8, 10, 13, 17, 19 mm wrenches, etc.), zip ties, duct tape, fencing wire, a multimeter, spare fuses, bulbs, fluids (oil, coolant, brake fluid) , and recovery gear like a tow rope and shackles. Some even carry spare U-joints, a fan belt, and a hub bearing when overlanding. This might be beyond routine maintenance, but it’s part of keeping a Defender running smoothly on long adventures - be prepared to fix common failures on the go.
In a forum thread on tools, owners chimed in with recommendations: Halfords socket set, propshaft tool kit, viscous fan spanner, 52mm hub socket, circlip pliers, hammer, pry bar were among the top mentions . Also humorously suggested was “a disc cutter, patience, and a sense of humor” for those really stubborn jobs - a nod to the fact that sometimes cutting a rusted bolt is easier than unthreading it. In short, arming yourself with a solid set of tools not only makes maintenance easier but also more enjoyable.
Recommended Upgrades and Parts for Reliability:
Over the years, Defender owners have identified certain upgrades that can enhance reliability or reduce maintenance needs. Here are a few widely recommended ones:
Stainless Steel Hardware: Replacing frequently corroding bolts (such as door hinge bolts, body fasteners, battery box screws) with stainless steel equivalents can ward off rust and make future disassembly easier. Be cautious of high-torque structural bolts (don’t swap those with stainless unless properly rated), but for many body and trim pieces, stainless or galvanized hardware stops the “brown rust drips” and seized bolts issue.
Brass Radiator/Thermostat Plugs: As mentioned, swap out the flimsy plastic coolant bleed screws on older models for brass replacements . It’s a cheap upgrade that can prevent a sudden coolant loss. Similarly, upgraded silicone coolant hoses and quality hose clamps (Worm-drive or T-bolt clamps) can prevent leaks - an upgrade especially popular on TD5 engines which run hot.
Headlight Relays or LED Lights: The stock headlight circuit on classic Defenders routes full current through the column switch, often resulting in dim lights and burnt switches. Installing a headlight relay kit (or wiring your own) offloads the current to relays and can noticeably brighten your headlights while preserving the switch - a classic reliability mod. Alternatively, many owners now fit LED headlamp units which draw less power and produce more light; just ensure they’re quality units and properly adjusted. Upgrading other lighting (LED tail lamps, side markers) can similarly reduce the load on old wiring and improve visibility.
Upgraded Clutch Components: If you have a Puma Defender (2.4 or 2.2 TDCi), you might know the clutch and transmission were a bit of a weak link if abused. When it comes time to replace the clutch, many fit a heavier-duty clutch kit (such as LOF or Ashcroft upgraded clutches) which handles torque better and lasts longer than stock. This is more of a renewal choice than a standalone maintenance item, but it’s a community-backed upgrade for longevity if you’re in there anyway. Likewise, earlier TD5 models sometimes suffered from a dual-mass flywheel failure - some owners convert to single-mass flywheels for simplicity when changing the clutch (noting there may be a slight increase in vibration).
Suspension Bushes: The original rubber suspension bushes give a comfortable ride but will wear. A popular “upgrade” is fitting polyurethane (poly) bushings which last longer and sharpen handling. They do transmit a bit more vibration, but many find the longevity worth it for a vehicle that’s hard on its bushes. Even if you stick to rubber, consider OEM quality replacements (like Genuine or OEM brands) rather than cheap aftermarket rubber that might not last. Keep an eye on the A-frame ball joint at the rear - a worn one causes rear-end clunk; upgrading to a heavy-duty ball joint can reduce play.
Raised Air Intake (Snorkel) and Extended Breathers: For those who off-road in dusty or wet environments, a raised air intake (snorkel) is a great addition. It draws cleaner, cooler air from roof level and dramatically cuts down how often your air filter clogs with dust. It also adds wading capability (though many will rightly point out a snorkel alone doesn’t make the vehicle waterproof!). Along with a snorkel, installing extended breather hoses for the axles, gearbox, and transfer case up into the engine bay or snorkel will prevent water from being sucked into those components during deep water crossings. These upgrades reduce maintenance by keeping fluids clean and dry, and filters cleaner. After installing, you’ll likely find less muddy water in your diffs and a longer life for your axle oil.
Temperature Monitoring: Some owners fit additional gauges to keep tabs on the vehicle’s health. A coolant temperature alarm or just an accurate aftermarket temperature gauge can warn you early of overheating (the factory gauge is notoriously vague). Likewise, a low coolant level sensor in the expansion tank is a smart addition - it can alert you to a sudden coolant loss (from a burst hose, for example) before the engine overheats. Turbo diesel owners often add an EGT (Exhaust Gas Temperature) gauge to monitor how hard the engine is working; keeping EGTs in check (by easing off the throttle if they climb too high) can prolong engine life if the fuel pump is turned up for power. These aren’t maintenance tasks per se, but they help you manage the vehicle’s condition actively, which ultimately aids longevity.
Other Small Upgrades: There are many little things the community has learned to improve. For instance, replacing the washer jets with misting jets from a later car for better windshield coverage, fitting a fuel pump access panel in the rear tub of station wagons (so you don’t have to drop the tank to replace the fuel pump), upgrading to an aftermarket heater matrix or fan for better cabin heat, installing sound deadening mats to reduce noise (your long-term sanity is a reliability factor too!), and so forth. While not all directly maintenance, they make caring for and driving the Defender more pleasant, encouraging you to keep it longer and in better shape.
Finally, a note on parts: whenever possible, use quality parts and fluids. The Defender community often stresses using genuine Land Rover or reputable OEM parts for critical items like filters, gaskets, etc., because cheap parts can fail quickly and create more work . For example, a bargain fuel filter or oil filter might not have the proper specs and could lead to fuel starvation or oil pressure issues. The consensus is that spending a little more upfront on good parts pays off in reliability. Keep a cache of common spare parts at home (and some in the vehicle): fan belts, hoses, filters, bulbs, fuses, and fluids. This way, your maintenance and any surprise repairs can be done swiftly without waiting for parts.
By incorporating these tools, spares, and upgrades, you’ll set yourself up for success in maintaining your classic Defender. You’ll spend more time enjoying the drive (or the trail) and less time stuck in the driveway with frustrating issues. A well-equipped, well-prepared owner is truly the Defender’s best friend.
Modern Defender L663 (2020-Present)
The modern-generation Defender (chassis code L663, launched in 2020) is a very different beast from its ancestor. It trades body-on-frame simplicity for a high-tech unibody, independent suspension, and a suite of electronics. Maintenance for the L663 Defender therefore has a different character: the intervals are longer, many systems are sealed, and advanced diagnostics are often required. However, owners can still play a role in routine care, and basic upkeep remains important for longevity. Below, we outline maintenance practices for the new Defender, including what you can DIY and what’s best left to the professionals or dealers.
Service Intervals & High-Level Routine
Land Rover engineered the new Defender with extended service intervals to reduce maintenance hassle (and likely to appease fleet operators). Officially, the recommended service interval is up to 21,000 miles or 24 months for the four-cylinder and six-cylinder petrol/diesel models . (The V8 version, being higher performance, is recommended at 16,000 miles or 12 months) . In practice, the vehicle’s on-board monitoring will signal when a service is due - it uses sensors to gauge oil quality and driving conditions, so the interval may shorten if you do frequent short trips, towing, or off-roading . The first scheduled service (at ~2 years/21k miles for most) typically includes an engine oil and filter change, a brake fluid flush, and replacement of the engine air filter and cabin (pollen) filter . The second service (around 42k miles/4 years) adds on a few more items like spark plugs (for petrol engines) or fuel filter (for diesels), etc., according to Land Rover’s maintenance checklist.
While these long intervals underscore the convenience of the modern Defender, many experienced owners still advocate for periodic checks and fluid top-ups in between. Fluids can be checked under the hood (though note: the new Defenders do not always have a traditional dipstick for engine oil - some use electronic oil level monitoring). It’s wise to check engine oil level occasionally via the infotainment or dipstick if equipped, especially before long trips. Likewise, glance at the coolant reservoir and brake fluid level monthly. Tire pressure and condition should be checked regularly (the vehicle has TPMS, but a visual check is smart), and don’t forget to inspect the spare tire. Land Rover dealers often encourage owners to come in for a complementary multi-point inspection annually even if a full service isn’t due . During such an inspection, technicians look for any developing issues - this can catch things like small leaks, worn brake pads, or software updates that need applying. If you prefer not to visit the dealer that often, you can do a home driveway inspection: look underneath for any fluid drips, check that all lights and features work (modern Defenders have lots of cameras and sensors - ensure they’re clean and functional), and listen for any odd noises. The mantra here is that even though the service intervals are lengthy, staying attentive in between is important .
One more important routine item on the L663: the On-Board Service Reminder. The vehicle will alert you when service is needed, and after performing an oil change (whether you or the dealer does it), the service indicator needs resetting. Interestingly, owners have discovered that the service light can be reset at home with a sequence of button presses - no special tool required . (Typically, this involves a combination of ignition cycles and accelerator/brake pedals - the exact procedure is documented in forums.) This is good news for DIYers, as you’re not forced to visit the dealer just to reset the reminder.
What Owners Can DIY vs. What Requires a Pro
The modern Defender is packed with advanced technology - from its Terrain Response system to dozens of control modules. This means that some maintenance tasks are no longer simple or even accessible to a DIY mechanic. However, there are still tasks an owner can handle, especially once the vehicle is out of warranty or if you’re aiming to save on dealership costs. Let’s break it down:
DIY-Friendly Tasks for L663:
Engine Oil & Filter Change: Yes, you can change your own oil on the new Defender. In fact, some owners report that “basic servicing is a piece of cake” on the L663 . That said, it’s a bit different than on a classic. The vehicle’s underside is largely covered by skid plates and aeropanels. To drain oil via the plug, you’ll need to remove the front skid plate and underbody covers - which involves unscrewing around 20-30 bolts and requires the vehicle to be lifted . It’s not difficult, but it is time-consuming. As an alternative, many owners use an oil extractor pump to suck the oil out through the dipstick/filler - this avoids removing the armor and is actually the method some dealerships use . Whichever way, you can obtain the correct spec oil and filter (genuine filter recommended) and do the change at home. Just be sure to reset the service indicator afterwards. Tip: The Ingenium engines take a specific oil spec (Jaguar Land Rover STJLR spec) - use the recommended 0W-20 or 5W-30 synthetic oil as per your engine type. After changing oil, properly dispose of the old oil (auto parts stores often take waste oil).
Air Filter and Cabin Filter: Replacing the engine air filter is generally straightforward and similar to other cars - the airbox is accessible under the hood (though space is tighter with all the plastic covers). It usually involves unclipping the airbox lid and swapping the filter. The cabin air (pollen) filter is often located behind the glove box or under the dash; this can be a bit fiddly but is doable with basic tools. Changing these filters on schedule keeps the engine breathing well and your interior smelling fresh. If you often drive in dusty conditions, consider checking/changing the air filter more frequently than the 21k-mile interval.
Wiper Blades and Bulbs: Simple but important - owners can easily change their wiper blades (front and rear) and any traditional bulbs (though much of the exterior lighting is LED on the new Defender, some models may have conventional bulbs for certain lights). Consult the manual for how to put the wipers in service position for easy access. Keeping wipers fresh is essential for those panoramic views and the rain-sensing to work well.
Brake Pads (Maybe): The Defender L663 has modern disc brakes with electronic parking brake and (on some trims) brake pad wear sensors. Changing brake pads and rotors can be a DIY job if you’re experienced - the principles are the same as any other car. In fact, at least one owner on forums was seeking instructions to do exactly this. If you go this route, you must know how to retract the electronic parking brake (often requires putting the EPB in maintenance mode via a scan tool or manually winding it back) and be sure to replace any wear sensors you disconnect. Brakes are safety-critical, so if unsure, leave it to the dealer or a brake shop. But for enthusiastic DIYers, with the right guidance, pads/rotors are not off-limits.
Battery Maintenance: The new Defender has an AGM battery (sometimes even a dual-battery setup if equipped with auxiliary battery for Stop/Start system). While you shouldn’t have to touch it often, if the battery needs replacement, it’s something an owner can do with caution. There’s a battery monitoring system that might need a reset (via diagnostic tool) when a new battery is installed. Always maintain power to the vehicle (using a memory saver or secondary battery) when swapping to avoid losing module data. Alternatively, many owners will let the dealer handle battery swaps under warranty or during service due to the electronics involved. But keeping the battery charged and terminals clean is basic and can be done at home - modern Defenders, with all their tech, are sensitive to low voltage, so using a smart charger if the vehicle sits for long periods is a good idea.
Software Updates (OTA): While not a physical DIY task, one maintenance aspect for modern Defenders is software updates. Land Rover issues updates to improve systems (infotainment fixes, module updates, etc.). The L663 can receive many of these Over-The-Air (OTA). Owners should ensure they connect the vehicle to Wi-Fi or use its mobile data to download updates, and then approve the installation (usually the vehicle will prompt you). Keeping your Defender’s software up to date is akin to “maintenance” for the electronics - it can solve bugs and extend functionality. For deeper module programming or diagnostics, an owner could invest in a JLR-compatible diagnostic tool (like the GAP IIDTool or JLR SDD system) once out of warranty, but that’s for the truly dedicated. Most will rely on OTA and dealer visits for software matters.
Tasks Best Handled by Professionals (Dealership or Qualified Shop):
Complex Diagnostics & Electronics: The new Defender’s systems are integrated and complex. If you get warning lights (check engine, air suspension fault, etc.), reading the fault codes often requires a proprietary scanner. Dealerships or Land Rover specialists have the Pathfinder diagnostic system that can talk to every module. They can pinpoint issues with sensors, update software as needed, and calibrate systems (like the suspension height calibration or camera alignments). If something goes wrong with the infotainment or driver assistance systems, it’s almost certainly a dealership fix (maybe just a software reflash). While basic OBD-II scanners can read engine/transmission codes, they won’t access the dozens of other modules. So for electronic glitches or “gremlins”, professional help is usually the most efficient route.
Fluids that require special procedures: Some fluids on the L663 are not as straightforward to change as engine oil. For example, the 8-speed automatic transmission is sealed and “filled for life” (though many experts suggest changing ATF around 50k-75k miles for longevity). However, changing it involves a specific procedure (temperature monitoring, special fluid fill tools) and possibly programming to tell the car new fluid is in. Similarly, the cooling system might require vacuum filling to avoid air pockets. And the brake system - with ABS/ESC - may need electronic cycling of the ABS pump to properly bleed. These are jobs typically left to dealers or well-equipped independent shops. If you desire to do them, make sure you have the correct tools and know-how (some DIYers do tackle these, but it’s advanced).
Warranty and Recalls: If your Defender is under the initial warranty period, any significant maintenance or repair might be best done by the dealer to maintain warranty coverage. Also, Land Rover has had some recalls and service actions (e.g., door sealing issues, software patches for the telematics, etc.). It’s wise to let the dealer handle those as they come - usually free of charge. It may be inconvenient, but it ensures that any known factory issues are addressed by professionals.
Calibration and Safety Systems: The new Defender has features like adaptive cruise control, emergency braking, lane keep assist, and so on. Many of these systems require calibration if disturbed (for instance, replacing a windshield will require a camera recalibration). Professional shops have the equipment to do this. Similarly, the air suspension (if equipped) has its own maintenance - the compressor has a filter that might need replacement eventually, and any work on the suspension (like replacing a height sensor or air spring) usually involves recalibrating ride height with a diagnostic tool. This is generally not DIY territory for the average owner.
General Complexity: There’s an anecdote in the community that “the new Defender is basically a computer on wheels”. That’s not far off - even changing something like the auxiliary battery or a headlight unit can require notification to the vehicle’s systems. As such, the threshold for DIY is higher. Many owners choose to do the basic fluid and filter changes themselves to save money (especially given some dealers charge eye-watering prices, like $1,200 for a simple first service ), but leave everything else to the professionals. One owner in Texas noted dealers quoting $1200-$1400 for the first 20k-mile service , whereas a good independent shop did it for $200 . This highlights two things: dealer service can be very costly, and there are independent alternatives once you’re out of warranty or if you prefer not to use dealers. If you find a qualified Land Rover specialist, they can often do maintenance at a fraction of dealer cost (and sometimes with more personalized service).
In summary, owners can handle routine fluids and simple replacements on the L663, but for anything involving the electronics, software, or complex mechanical systems, a pro is the way to go. The modern Defender is designed to be maintenance-light for the user, so you won’t be tinkering with it as much as a classic - and that’s okay. Focus your DIY efforts where they make sense (to save money or for enjoyment), and don’t hesitate to use the dealership or a specialist for the rest.
Preventative Care for the Modern Defender
Preventative maintenance on the L663 is a bit different, since so many systems are sealed or monitored by the vehicle’s computer. Nonetheless, here are some proactive steps and checks to keep your new Defender running its best beyond the standard service items:
Underbody and Corrosion Protection: The new Defender has an aluminum-intensive body and a mixture of aluminum and high-strength steel in the chassis. This gives it better inherent corrosion resistance than the old steel chassis, but corrosion can still affect steel components (suspension arms, subframes, fasteners). If you live in the rust belt or frequently drive on salted roads or beaches, it’s wise to apply an underbody protectant. As mentioned, many mechanics recommend lanolin-based sprays (Fluid Film or similar) annually on steel bits to prevent rust. Pay attention to the steel rear cross-member, suspension linkages, and any exposed bolt heads. Also, the new Defender’s frame rails have plenty of holes - spraying inside them with a cavity wax could be beneficial if you plan to keep the vehicle long-term. At the very least, rinse the undercarriage thoroughly after exposure to salt or mud. Mud can hide in the skid plates and cause galvanic corrosion if left. Some owners remove the plastic covers occasionally to clean out trapped dirt - doing so once in a while can prevent long-term corrosion underneath.
Paint and Body: Modern paint is durable, but if you get chips (especially on steel components like the steel wheels or optional steel roof on base models), touch them up to prevent rust. The Defender’s body panels are mostly aluminum or composite, so they won’t rust, but they can corrode galvanically if bare aluminum is exposed near steel. Keeping a good wax or ceramic coating on the paint will help protect it from the elements and make washing off mud easier. Also, keep the panoramic roof drains clear (if you have the safari roof windows or sunroof). Debris in drains can lead to water leaks into the headliner - a quick check and clean of drain outlets (usually in door jambs or under the car) can save a headache.
Fluids Beyond Engine Oil: While many fluids are “filled for life,” if you plan to keep your Defender well past the warranty, consider a mid-life fluid change for things like the transmission, differentials, and transfer case around ~50k miles or after particularly harsh use (like extensive off-roading or water fording). Changing these fluids isn’t part of the standard schedule (dealers might say it’s not needed), but fresh fluid can prolong the life of expensive components. For example, replacing axle differential oil after deep water crossings is cheap insurance in case any moisture got past the breather valves (even though the breather design is improved). The transfer box (especially in the full-time 4x4 system) works hard, so fresh transfer case oil every ~40k-50k miles could be beneficial. These tasks might be best done by a professional due to access and the need for specific fluid types (the transfer case on the L663 might require a particular spec fluid).
Brakes and Suspension: The modern Defender comes with robust brakes (often large discs with twin-piston calipers). Preventative care here means flushing brake fluid every 2-3 years even if miles are low, to maintain a firm pedal. Also keep an ear out for brake noises - a squeal might just mean cleaning needed, but a grind means act immediately. The air suspension (if equipped) doesn’t need regular maintenance per se, but inspect the air springs (bags) for cracks as they age (many years down the line) and ensure the compressor intake filter is clean. For coil-sprung models, check the condition of coil springs and shocks periodically - leakage from a shock or sagging corner should be addressed to avoid uneven tire wear or further suspension strain.
Engine and Drivetrain Preventatives: The Ingenium engines (both petrol and diesel) are advanced - they use timing chains, variable valve timing, turbos, etc. They generally don’t require “tune-ups” like older engines (spark plugs are changed around 42k miles for gas engines as part of service). To keep them healthy, the main thing is quality oil changes on time. One could argue for doing oil changes a bit more frequently than 21k miles if you plan to keep the vehicle for 200k+ miles - many enthusiasts are old-school and will do it annually or ~10k miles despite the official interval, simply because fresh oil is cheap protection . This is up to you and your usage pattern. Another tip: avoid short trips when possible - lots of short, cold-run trips can lead to oil dilution (particularly on the Ingenium petrol engines that have had known issues with fuel dilution in oil). If you primarily do short trips, an intermediate oil change is a good idea.
Cooling System: The cooling system is critical - make it a habit to glance at the temperature gauge (or the temp display) regularly. The new Defender will warn you if it’s overheating, but it’s good to be mindful. Ensure the front radiators are kept clear of mud and leaves - the Defender can have multiple coolers (engine radiator, intercooler, A/C condenser, transmission cooler) stacked behind the grille and lower fascia. After muddy adventures, gently hose out the radiator area from behind (with low pressure) to clear dirt. This prevents the engine from running hot and the HVAC from losing effectiveness. Coolant is long-life, but you might consider a coolant change at around 10 years as preventative maintenance.
Preserving the Interior & Electronics: The modern interior is much more complex than the classic’s, with expensive electronics. Preventative care means avoiding unnecessary exposure to extremes. For instance, if you do deep water crossings, know that while the Defender is rated for wading (about 35 inches), repeated soaking of the lower interior (carpets, etc.) could cause electrical connector corrosion or seat motor issues. After any water ingress, dry out the car thoroughly. Using all-weather floor mats and seat covers when off-roading can protect the interior finishes. Also, take care of the leather or fabric with appropriate cleaners - the new materials are durable, but mud and grit can wear them prematurely. Keep the climate control system running periodically (even in winter, run the A/C occasionally to circulate lubricant) to ensure seals don’t dry out.
Software/Feature Maintenance: Keep an eye on any technical service bulletins (TSBs) or recall notices. Sometimes Land Rover will issue a service action to, say, update the telematics module because of battery drain issues, or to replace a certain sensor that has shown faults. Getting these done when offered will prevent you from experiencing the failure. A known example: early L663 Defenders had occasional issues with the remote keyless entry or the Pivi Pro infotainment - software updates solved many of these. So when at the dealer, always ask them to check for any available updates or recalls.
In essence, the new Defender doesn’t require the constant tinkering of the old one, but attentive care is still crucial. By keeping it clean, monitoring fluids and software, and addressing small issues promptly, you’ll enjoy the modern Defender’s capabilities with minimal downtime.
Special Considerations (Off-Road, Towing, Seasonal) for L663
Just like the classic, if you use your modern Defender in extreme conditions, a few extra steps will help preserve it:
Off-Road Use: The L663 is very off-road capable, but all that tech (like adjustable air suspension, terrain response, etc.) means more to look after. After off-roading, do the same thorough wash underbody as you would a classic. Pop off the wheel arch liners if mud got behind them. Check that none of the sensor wiring (such as for wheel speed sensors, height sensors) have been torn by branches or rocks. The Defender’s air intake is fairly high from factory, but ensure the air filter didn’t ingest water or mud in very dusty trails - replace or clean it if needed. One big advantage of the new Defender is sealed joints - no grease nipples to worry about - but that means if you did go deep in water, listen for any new noises (wheel bearing hum or diff whine) which might indicate water contamination; if so, get those looked at (possibly fluid changes). Off-roading can also knock out alignment, so if the steering pulls or the steering wheel isn’t centered on-road, get an alignment check. And of course, inspect your tires for cuts or punctures.
Towing/Heavy Loads: The modern Defender makes towing easy with its power and tech (like tow assist). If you tow frequently, follow the severe service schedule (which might call for more frequent oil changes). Also keep an eye on the transmission temperature (the vehicle will warn if it’s too hot). After very heavy towing (especially in mountains or hot weather), it wouldn’t hurt to do an earlier ATF change despite “lifetime” fluid. When towing boats, try not to submerge the rear too far - though rated for wading, repeatedly dunking the rear hubs in water while hot (after highway driving) could cause contraction and sucking in water as they cool. Do a quick inspection of rear diff and wheel bearings at service if you frequently retrieve boats from the ramp.
Winter Cold: The L663 has a lot of batteries and electronics - cold can reduce battery performance. If parking outside in extreme cold, a battery maintainer might be useful to avoid low battery warnings. Use the factory fuel-fired heater if equipped to pre-warm the engine - it not only makes the cabin toasty, but also reduces cold start wear. Check your washer fluid is winter-grade and the headlight washers (if you have them) actually retracted (they can stick). The new Defender’s door seals are better than the old, but still good to keep them clean and perhaps treat with a rubber conditioner to prevent freezing shut.
Storage: For seasonal or long-term storage of the L663, similar tips as the classic: keep battery charged, rodents out, and the vehicle clean. One thing specific to modern cars - you might want to turn off the interior motion sensor (if leaving it locked in storage) to avoid alarm triggers. Also, the many ECUs can create a small parasitic drain; a battery tender is highly recommended if leaving the vehicle more than a few weeks. Tire flat-spotting can happen on heavy SUVs - moving the vehicle periodically or overinflating tires for storage helps.
Notable Tools and Accessories for the L663 Owner
Unlike the classic, you won’t need a big mechanical toolkit for everyday issues on the L663. However, a few modern tools and accessories can be useful:
OBD-II Scanner or Diagnostic App: A basic OBD-II code reader or a Bluetooth adapter with an app (like Gap IID or others specific to JLR) can empower you to check engine codes and even customize settings. For instance, the Gap IIDTool (a favorite in Land Rover circles) can calibrate suspension, read all module codes, and reset service reminders. It’s pricey but if you’re a hands-on owner, it pays for itself by saving dealer visits. Even a generic reader is good to have on a road trip to read a check engine light - sometimes it might be a loose fuel cap or mild sensor issue that you can address.
Jack and Recovery Gear: The new Defender comes with decent jacking points and sometimes an inflator kit (for models without a spare). If you off-road, carrying a proper jack (bottle or a specialized off-road jack) and recovery boards/straps is wise, just as with the classic. The difference: if you have air suspension, you can use the suspension to help lift the vehicle for tire changes by raising to off-road height first. But still, use a jack stand or brace - safety first.
Protection Upgrades: Many L663 owners install accessories that also serve a protective role, reducing maintenance needs. For example, mud flaps - they keep mud off the lower body and critical areas, thus preventing corrosion and paint chips. Skid plates/bash plates - although the Defender has decent protection, aftermarket plates (for the fuel tank, transmission, etc.) can prevent damage that would be costly to fix. Rock sliders or side steps can protect the sills. Think of these not just as off-road mods, but as preventative measures to avoid having to hammer out dents or replace damaged parts later.
Spare Tire Cover: The rear-mounted spare on the new Defender is exposed - a cover (hard shell or soft) will protect it from UV and weather, prolonging the life of that tire (and also deterring theft or vandals from tampering with it).
Cleaning Supplies: It sounds trivial, but having a good set of cleaning tools - a pressure washer (on a gentle setting for radiators), soft brushes for wheels (modern alloys with complex designs trap brake dust), interior cleaning wipes safe for touchscreens, etc. - will help you keep the Defender in tip-top shape. The new interior has different materials (e.g. the “Resist” fabric or the Windsor leather, the rubberized floor, etc.), so using the right cleaners will maintain their look and function (especially the grippy floor - you don’t want it slippery, just clean).
Extended Warranty: This isn’t a tool, but it’s worth mentioning for the modern Defender. Many owners opt for extended warranty or service plans given the vehicle’s complexity. While not everyone will consider this “maintenance,” it is a form of financial maintenance - knowing that if something major goes wrong (say, an air suspension fault or an engine issue) beyond the standard warranty, it’s covered. If you plan to keep the L663 long-term and drive it hard, an extended warranty could save a lot on “maintenance” in the sense of unexpected repairs.
Costs, Accessibility, and Reliability Notes
To wrap up, let’s touch on the practical aspects of maintaining a Defender - both classic and modern - in terms of cost and reliability outcomes:
Cost Management: Defenders can be pricey to maintain if you rely solely on dealers, but the community has thrived by sharing cost-saving tips. For classics, doing most of the work yourself and sourcing parts from reputable aftermarket suppliers (or direct from the UK) can make ownership affordable. There’s a huge ecosystem of Land Rover parts vendors. Often, a part that a dealer might quote high for, you can find an OEM equivalent for much less. The key is knowing where quality matters (e.g. use genuine seals and gaskets where possible) and where you can get away with aftermarket. The forums are a goldmine for this kind of advice. For the modern Defender, maintenance cost is higher (complex parts, synthetic fluids, etc.). If you’re out of warranty, find a good independent Land Rover mechanic - labor rates are usually lower than the dealership, and they often charge less hours for the same job because they’re more flexible (for instance, a dealer might charge a flat rate that includes extras you may not need, whereas an indie can cut to the chase). Some owners were shocked at dealer quotes (like the $1,200 first service), only to find independents or doing it themselves could cut that by 70-80% . Plan your maintenance budget and prioritize - safety items (brakes, tires) first, preventative fluid changes next, and mods/upgrades as optional. You can read more on Land Rover Defender ownership costs here.
Accessibility: Working on a Defender classic is generally easy - things are bolted on and exposed. By contrast, the modern Defender, with its electronic systems and tight packaging, is less accessible. However, basic items (oil filter, air filter, brake components) are still reachable with standard tools. The vehicle’s own systems sometimes help (air suspension can raise the vehicle for access; the car can report issues via the dashboard). Use the tech to your advantage: the tire pressure monitoring keeps tabs on tires, the vehicle health monitoring can notify you of low key fob batteries or other maintenance reminders. In short, leverage the built-in diagnostics for accessibility to info, and accept that for physical accessibility, sometimes you’ll need to remove a few more things (like skid plates) to reach service items. It’s part of the design trade-off for a smooth underbody.
Reliability through Maintenance: A well-maintained Defender, old or new, can be reliable. Many classic owners proudly report hundreds of thousands of miles on original drivetrains thanks to diligent maintenance. The modern Defender hasn’t been around as long, but early indications are that if you take care of it (and address recalls), it’s proving robust. One forum member noted their new Defender “seems well put together and reliable” and they weren’t bothering with an extended warranty because of confidence in build . Time will tell, but your maintenance efforts directly impact reliability. For example, an old Defender that’s greased and oil-changed properly might never leave you stranded, whereas neglecting those could snap a dry U-joint or overheat an old engine. Likewise, a new Defender that gets its software updates and fluid services should age more gracefully (while an ignored low coolant warning or postponing a brake service could lead to bigger issues).
Resale and Longevity: Good maintenance records and care also preserve the value of your Defender. These vehicles - classic ones especially - are appreciating or at least holding value, and a well-cared-for example is always more desirable. Even for the new ones, given their high cost, a future buyer (or your future self) will be grateful that you did that extra fluid change or kept it rust-free.
In conclusion, maintaining a Land Rover Defender - whether a 1995 Tdi or a 2025 P400 - is a commitment, but also a deeply rewarding aspect of ownership. These vehicles often become part of the family, and caring for them becomes second nature. Armed with the knowledge from fellow owners and mechanics, you can approach Defender maintenance with confidence. Remember that the key areas are regular servicing, rust prevention, and addressing issues early. Do that, and your Defender will be ready to tackle mountain trails or daily commutes for decades to come, all while retaining that indomitable spirit that defines the badge.