Land Rover Defender Overlanding: Building the Ultimate Expedition Vehicle
Discover how to build the ultimate Land Rover Defender for overlanding. This in-depth guide covers essential upgrades, camping setups, navigation tools, and safety gear for both classic and modern Defender models—perfect for adventurers seeking long-distance, self-reliant travel.
Overlanding has seen a massive rise in recent years. In the U.S. alone, over 12 million people now identify as overlanders, drawn to the freedom, challenge, and simplicity of life on the road.
If you’ve just bought a Defender with adventure in mind, or you’re dreaming of one parked in the driveway, there are few vehicles better suited to the job. The Defender has long been a favourite among explorers and expedition crews, with a reputation built on decades of real-world adventure.
From the mud-soaked jungles of the original Camel Trophy to dry outback tracks closer to home, these trucks have proven themselves time and again. That legacy continues with the new generation, which combines serious 4×4 capability, strong aftermarket support, and real versatility across just about any terrain.
Whether it’s rainforest creek crossings or steep alpine trails on a long weekend, a well-set-up Defender feels right at home. This guide covers everything you need to start your overlanding build, from essential mods and camp gear to safety equipment and trip planning tips.
Ready to turn your Defender into a go-anywhere, live-anywhere rig? Let’s dive in.
Table of Contents
Essential Modifications for Overlanding
Suspension and Tyres
Roof Racks and Storage Solutions
Auxiliary Fuel and Water Tanks
Off-Road Protection and Other Upgrades
Camping and Living Solutions
Roof Tents and Sleeping Arrangements
Cooking Setups and Refrigeration
Power Management Systems
Navigation and Communication
Navigation Systems and Mapping
Communication for Remote Areas
Safety and Recovery Gear
1. Essential Modifications for Overlanding
Turning your Defender into a proper overland rig isn’t about slapping on the flashiest gear - it’s about smart upgrades that make a real difference when you’re hundreds of kays from the nearest servo. The factory setup gives you a solid starting point (especially if you’re in a newer model), but a few key mods can take it from capable to adventure-ready.
If there’s one thing seasoned overlanders will tell you, it’s this: keep it simple. Overbuilt rigs look great on Instagram, but it’s the reliable, well-thought-out setups that actually make it home in one piece. Whether you’re rolling in a Classic or an L663, here’s a breakdown of the essential gear to get your Defender truly trip-ready.
2. Suspension and Tyres
Ask anyone who’s gone beyond the bitumen. tyres and suspension are where you start.
Suspension
For the Classics, a small lift and a good set of uprated shocks and springs (think Old Man Emu or similar) can make a big difference. It’ll help you clear obstacles, carry extra weight, and soak up the rough stuff without shaking your teeth out.
If you’ve got a new Defender, chances are you’ve already got air suspension. It’s smooth, clever, and surprisingly capable, especially with the height adjustment. If you’re heading deep into remote areas, it’s worth thinking about what happens if something goes wrong. Some overlanders pack spare air suspension parts just in case. Others go all-in with a coil conversion. Bit extreme for most trips, but it depends on how far off-grid you’re planning to go.
Tyres
This one’s non-negotiable. Stock highway tyres might survive the suburbs, but swap them out before your first proper trip. All-terrains are the go-to for most overlanders, since they handle dirt, rocks, and sand without killing your on-road comfort. Mud-terrains are an option if you’re expecting… well, mud. But they can be noisy and wear quicker on the road.
Classic Defenders run 16–18” wheels and can take bigger tyres (like 33s or 35s) with a little suspension tweaking. New Defenders often come with 20” rims which are great for city flex, not so much for the bush. Downsizing to 18s gives you a taller sidewall, better protection off-road, and lets you air down safely when things get soft.
Whatever tyre you go for, make sure it’s got a decent load rating and solid sidewall construction. You want something that can handle weight and shrug off punctures. And always carry at least one full-size spare. Two if you’re heading somewhere properly remote.
Also, forget the temptation to go crazy with oversized tyres and sky-high lifts. They might look tough, but they hammer your fuel economy and stress out your driveline. A balanced, functional setup always wins in the real world.
3. Roof Racks and Storage Solutions
Overlanding means gear. From tents and tools to spare fuel and recovery boards, how you pack becomes just as important as what you pack. A good roof rack is usually one of the first upgrades for a reason. It’s practical, tough, and gives you a spot for bulky stuff that doesn’t belong inside.
Classic Defenders often run full-length steel or aluminium racks. They’re strong, simple, and built to carry just about anything: rooftop tents, jerry cans, Maxtrax, even a spare wheel. Just make sure your mounting points are solid and don’t overload it.
New Defenders (like the 110 or 130) come with roof rails, and there’s no shortage of aftermarket platform racks that bolt straight on. Whether you go full expedition or low-profile, always check the dynamic load limit - that’s how much weight you can safely carry while driving. Use proper tie-downs or lockable mounts, and re-check them often.
As a general rule, keep lighter, bulkier items on the roof and the heavier gear inside. It helps with stability, especially when things get off-camber or rough.
Inside the rig, drawer systems make a huge difference. Whether it’s a full-length custom setup or a few stackable boxes, having a place for tools, recovery gear, and kitchen stuff keeps things tidy and easy to grab when you need them. Classic 110s have tall, square cargo space that works well with drawers or stacked cases. The newer Defenders have more sculpted interiors, but there are now storage systems made specifically to fit.
Use tie-down points or cargo nets to stop gear flying around. Some owners go further and add lockboxes, under-seat storage, or a centre console safe for valuables. On the outside, side-mounted gear boxes or MOLLE panels can hold tools, traction boards or anything dirty you don’t want inside.
The key is to stay organised and keep essential gear accessible. A clean, balanced setup makes life easier, especially when you’re setting up camp in the dark or trying to find your coffee gear at sunrise.
4. Auxiliary Fuel and Water Tanks
One of the greatest challenges in remote travel is having sufficient fuel and water. Defenders can be outfitted to carry much more of both than stock. Extended-range fuel tanks or auxiliary fuel tanks are popular upgrades, especially in older Defenders.
These additional tanks integrate with the fuel system or act as transfer tanks, allowing you to carry dozens of extra litres of fuel. Many overland-prepped Defenders have 100+ litre total fuel capacity by using auxiliary tanks. In practice, this might involve installing a second tank under the rear (common in 110s) or mounting jerry cans on the rear bumper or roof rack.
The new Defender’s unibody design makes aftermarket long-range tanks less common so far, but owners often carry extra fuel in jerry cans on a roof rack or rear swing-away carrier when venturing far from petrol stations. Plan your fuel needs based on the worst-case range between refills on your intended route, and build in a safety margin.
Water is equally vital. A built-in water tank with a pump can turn your Defender into a self-contained base camp. Options range from underfloor water tanks (some slot into the rear wheel well area of a classic 90/110) to simple jerry cans or Front Runner style roof-mounted water bladders.
A typical setup might carry 20-50 litres of freshwater for drinking, cooking, and washing. Ensure any tank is food-grade and secured in place. It’s often useful to have a tap or hose attachment for easy access, for example, a rear bumper-mounted tap or a small 12V pump for pressurized water flow.
Weight note: 1 litre of water weighs 1 kg, so store water low and centered if possible. Roof-mounted water storage should be used only if necessary and kept to a minimum since it raises the center of gravity.
Between auxiliary fuel tanks, water tanks, and other gear, these expedition conversions give the Defender the range and self-sufficiency needed for extended off-road travel.
5. Off-Road Protection and Other Upgrades
Remote travel means encountering challenging terrain, so outfitting your Defender with added protection and off-road upgrades is wise.
Armor for the vehicle’s vulnerable parts will ensure it survives trail abuse. This includes steel bumper replacements (or bull bars) front and rear that can both protect against animal strikes and serve as a mount for a winch.
The classic Defender often sports an “A-bar” or heavy-duty bumper with an integrated winch mount. The new Defender can also be fitted with aftermarket bull bars or hidden winch mounts from specialty manufacturers, although its modern styling makes this a more involved upgrade.
Adding rock sliders along the sills will protect the body when navigating rocks or deep ruts. Underbody skid plates(for the engine, transmission, fuel tank, etc.) safeguard vital components from rocks and logs. For example, Camel Trophy Defenders were outfitted with sturdy underbody bash plates as part of their competition upgrades.
A raised air intake (snorkel) is a common addition for river crossings and dusty environments. It allows your engine to breathe cleaner, cooler air from roof level and significantly increases fording depth. Both classic and new Defenders can be equipped with snorkels - Land Rover even offers a factory raised intake for the modern Defender as an accessory.
Off-road lighting is another useful enhancement for expedition vehicles. Adding LED driving lights or a light bar on the roof/bumper helps illuminate remote tracks when you have to set up camp after dark or deal with pre-dawn starts. The Trophy edition Defenders released by Land Rover Classic themselves came with a full-width LED light bar for nighttime visibility in the bush - just remember that it may be illegal to use on roads.
Lastly, consider upgrades that improve reliability: heavy-duty steering components (e.g., upgraded steering rods and bushings) and enhanced cooling (if you’ll tackle hot climates or slow desert work). Many classic Defender overlanders preemptively replace aging parts (hoses, belts, wheel bearings, etc.) and carry spares to avoid breakdowns mid-expedition.
The bottom line is to build your Defender to survive the rigours of the trail, with protection, recovery points, and bulletproofed mechanicals, and it will safely carry you to incredible places.
6. Camping and Living Solutions
Overlanding isn’t just about the drive - it’s about living out of your vehicle comfortably in the wild. A Defender can be transformed into a mini RV with the right camping and living modifications.
In this section, we’ll explore how to set up your Defender for sleeping, cooking, and power needs on the road.
7. Roof Tents and Sleeping Arrangements
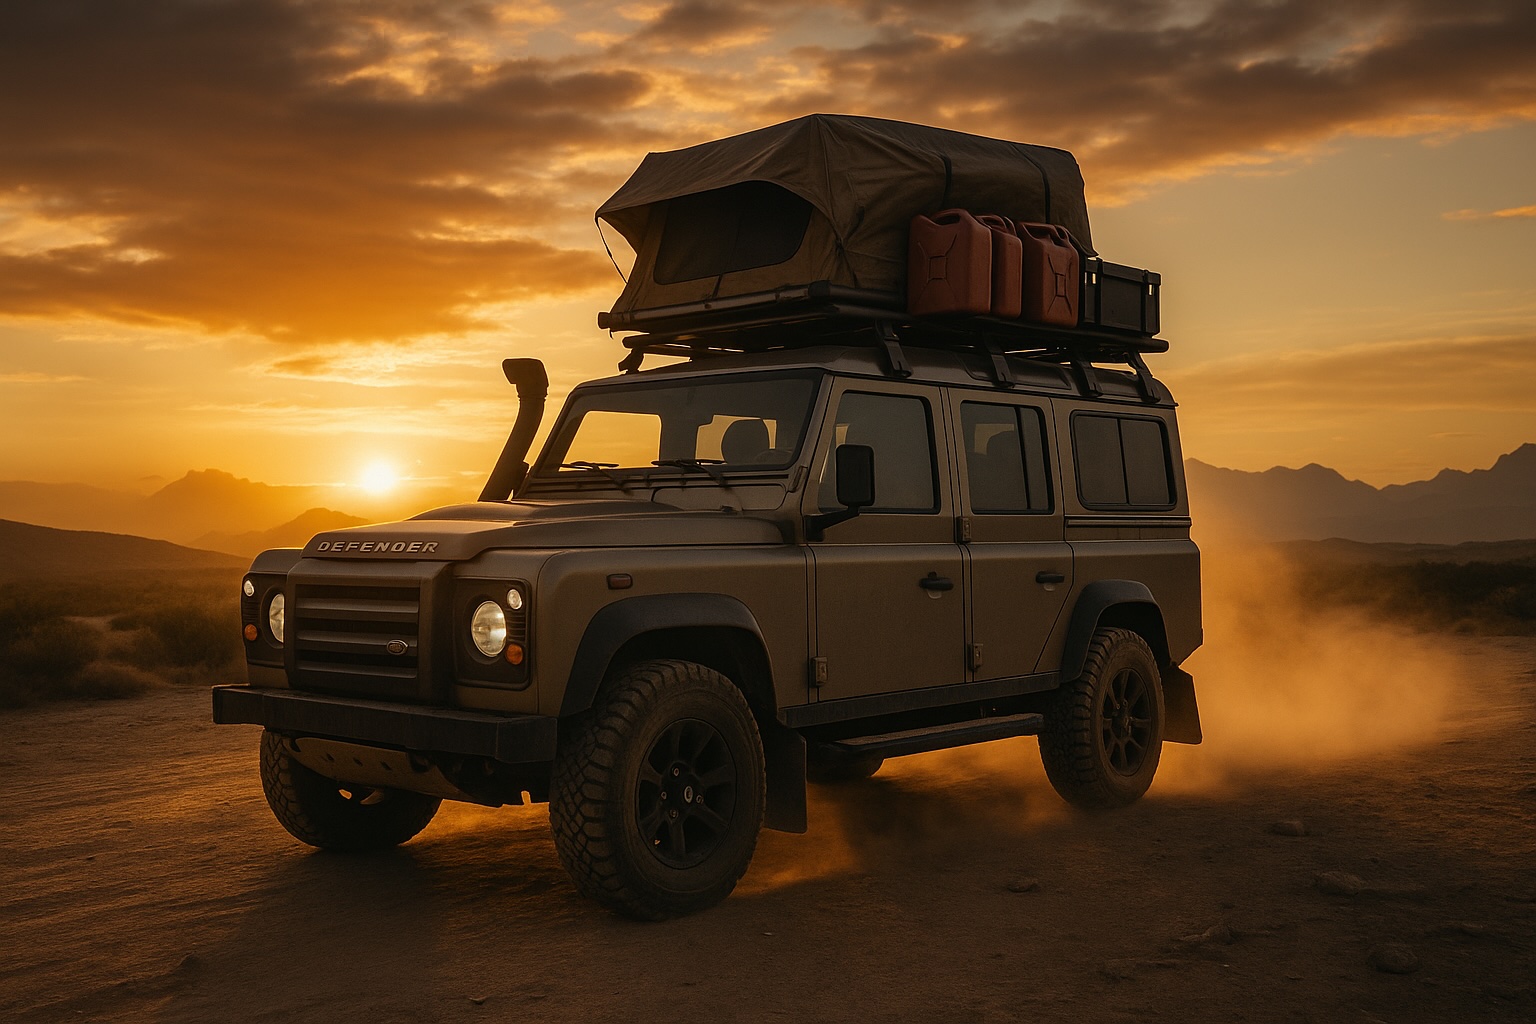
One of the most popular overlanding setups is a roof top tent mounted on the Defender’s roof rack. A roof tent gives you a flat, comfortable bed off the ground, safe from wildlife and mud.
Modern roof tents fold open in seconds and come with built-in mattresses, making camp setup very convenient. Land Rover actually partnered with Autohome to offer a hard-shell roof tent for the Defender that pops up with gas struts and includes a full-size mattress and ladder. These tents typically sleep two adults (some larger ones can accommodate a child as well) and provide a cozy, elevated bedroom.
Hard-shell designs (with fibreglass or ABS shells) are aerodynamic and durable, while soft-shell folding tents often allow a larger sleeping footprint and annex options. When choosing a roof tent, consider the weight and ensure your roof rack and Defender’s roof can handle it (remember the new Defender’s static roof load of 300 kg is plenty for two people and a tent). Mount the tent so it opens to the side or rear, whichever suits your typical camp setup.
For those who prefer to sleep inside the vehicle or need extra sleeping space, there are other solutions. Classic Defender 110 Station Wagons can be fitted with internal bed platforms once the back seats are removed or folded. This essentially turns the cargo area into a flat bed, albeit a fairly cozy one for two people.
Some owners install a pop-top roof conversion on Defenders (more common on older models) which adds an elevating roof and bed, similar to a camper van. If a roof tent isn’t your style, a good ground tent or swag (in Australia) can also serve your needs - just be mindful of campsite conditions (wet ground, critters). Many overlanders carry a small ground tent as a backup or for additional guests.
No matter your sleeping setup, also consider an awning on the side of the Defender. A simple pull-out awning provides shade and rain protection, effectively extending your living space for cooking or relaxing next to the truck.
8. Cooking Setups and Refrigeration
Eating well on the road is a joy of overlanding, and your Defender can house a functional kitchen setup. Start with the basics: a camp stove and a place to use it. Many people opt for a dual-burner propane stove (or butane, depending on region) for the versatility of two burners to cook meals and boil water simultaneously.
This stove can be a portable unit that you set on a table, or integrated into a slide-out kitchen drawer in the back of the Defender. For example, a common setup is a slide-out tray or chuck box that holds the stove, utensils, and maybe a built-in sink bowl, all accessible when you open the rear door or tailgate.
Classic Defenders with the side-hinged rear door often have fold-down tables attached to the door - a great spot to place a stove or prepare food. In a new Defender, you might achieve something similar with a drawer system or simply by carrying a sturdy camp table.
Refrigeration is a game-changer for long trips. A 12V portable fridge/freezer keeps your food fresh and drinks cold without needing ice. Brands like ARB, Dometic, and Engel make fridges in the 30-60 L range that fit nicely in a Defender’s boot.
These fridges run off your vehicle’s electrical system and can often be set to a specific temperature (some can even freeze). When installing a fridge, use a heavy-duty slide mount or straps to secure it, as they are heavy (especially when full) and you don’t want it moving while off-roading. Positioning the fridge near the door allows easy access to snacks on the road or ingredients at camp.
Keep in mind that fridges draw a significant amount of power over time, so you’ll need to account for that in your electrical setup (see Power Management below).
For kitchenware and food storage, organize into bins or drawers. It’s smart to have a dedicated kitchen kit with pots, pans, knives, cutting board, spices, and dish cleaning supplies. Stackable or nesting cookware saves space. Dry food and canned goods can be stored in wolf packs or plastic bins that slide into your storage system.
Don’t forget a water jug or tank with a tap for your kitchen - having running water for cooking and cleaning is extremely convenient. Many overlanders carry a small folding sink or basin to wash dishes. Plan your meals to suit the overland lifestyle: bring staples that last (rice, pasta, beans), and supplement with fresh produce and meats when you pass through towns. With a bit of planning, your Defender’s kitchen will let you enjoy hot, satisfying meals under the stars each night.
9. Power Management Systems
Being off-grid means you must manage your power carefully, especially with modern conveniences like fridges, lights, and device charging. Most serious overland builds incorporate a dual battery system in the Defender.
This involves adding a second deep-cycle battery (often an AGM or lithium battery) dedicated to running accessories. A smart isolator or DC-DC charger connects the second battery to the alternator, allowing it to charge while the engine runs, but protecting the starter battery from being drained by accessories when the engine is off.
In a classic Defender, there’s space under the passenger seat or in the engine bay for an auxiliary battery. In the new Defender, adding a second battery is more complex but there are kits to fit one in the rear or under the hood. The benefit of a dual battery setup is that you can run your fridge, camp lights, and charge devices from the aux battery and always be able to start the car with the main battery.
For extended stays, consider solar power as well. Portable solar panels (folding blankets or rigid panels) can be deployed at camp to top up your batteries during the day. Even a 100W panel can make a big difference in keeping a fridge running indefinitely when paired with a good charge controller. Some overlanders mount solar panels on the roof rack, which charges whenever sun is out (though parking in shade vs. sun becomes a consideration).
You’ll also want an inverter if you need to run any AC appliances (like a laptop charger, camera battery charger, or power tools). A small pure-sine inverter of 300-500W is usually sufficient for electronics and can be wired into the secondary battery system. However, many modern devices charge via USB or 12V adapters, so large inverters are often unnecessary. Instead, wire plenty of 12V sockets and USB charging ports around the cabin and rear cargo area for convenience.
You may also install LED camp lights, for instance, strip lights on the inside of the tailgate or an LED area light on the side of the roof rack. These consume little power but greatly ease nighttime activities.
Lastly, monitor your power. A voltmeter or battery monitor readout will tell you the state of your batteries. Many dual battery isolators have simple LED gauges, or you can use a Bluetooth battery monitor to see voltages on your phone.
Know the limits of your system; for example, if stationary for a few days running a fridge, watch that the auxiliary battery doesn’t get too low. With a robust power management system, your Defender can support a comfortable camp with cold food, lit surroundings, and charged cameras-all without hookups to grid power. This independence is a cornerstone of overlanding.
10. Navigation and Communication
When you’re far off the beaten path, knowing where you are and staying in touch are vital. Overlanders rely on a combination of modern technology and old-school navigation to traverse unknown territories safely. In addition, communication devices provide a lifeline in remote areas where cell phones have no signal. Let’s look at the navigation tools and comms gear that will keep your expedition on track and in contact.
11. Navigation Systems and Mapping
A successful overland journey starts with good navigation. While the Land Rover Defender can take you deep into the wilderness, you need to know where to go (and how to get back). Modern electronic navigation options are abundant: handheld GPS units, dedicated off-road navigators, and smartphone/tablet apps with offline maps are all popular.
Devices like the Garmin Overlander, Garmin Montana, or tablet-based apps (Gaia GPS, onX Offroad, Hema Maps, etc.) can show topographic details, trails, and waypoints even when you have zero cell service. However, it’s unwise to rely on a single device or app. Electronics can fail, and data might not load if you forgot to download maps ahead of time.
As overlanding experts note, you should carry multiple navigation methods including good old paper maps and a compass rather than trust one gadget alone. Before any trip, download offline maps for your GPS app and bring relevant paper maps/atlases for your region (for example, Hema maps for Australian outback tracks, or U.S. Forest Service maps for American trails).
A great strategy is to combine tools. For instance, you might plan the broad route on Google Maps or a digital mapping software, then use a 4x4-specific app to find interesting off-road tracks and campsites, and finally mark key points on a paper map as backup. During travel, many overlanders mount a tablet or phone on the dash running a navigation app for real-time positioning. Meanwhile, keep a handheld GPS as a secondary unit in case the primary fails.
In really remote navigation (say, deep deserts or complex unmarked trails), consider carrying a handheld hiking GPS or even a satellite navigator as an extra backup. An example of multi-layered navigation: one traveller in Africa used a mix of Gaia GPS app, Tracks4Africa paper maps, a Garmin Overlander device, and pre-loaded GPX tracks to find the route less traveled.
No matter the tech, practice using it beforehand. And ensure everyone in your party knows the basics of map reading - if you can pinpoint your location on a topo map and plot a route to your next destination, you’re never truly lost.
12. Communication for Remote Areas
When venturing into areas without mobile reception, having reliable communication tools is a safety essential. Two-way radios are a staple for vehicle-to-vehicle comms if you’re traveling in a group.
In Australia, a UHF CB radio mounted in the Defender lets you talk with convoy members or even truck drivers on the highway (and is useful for calling out to any nearby help on the standard channels). In North America, CB radios are common too, though some overlanders prefer VHF/UHF ham radios (with a license) for greater range and clarity. A newer option is handheld GMRS or UHF radios which can work car-to-car or with repeaters. Equip your Defender with at least one form of radio communication-even a handheld walkie-talkie can be useful if someone hikes away from the vehicle.
For reaching the outside world when truly remote, satellite communication devices are the gold standard. A popular choice is the Garmin inReach, a satellite messenger that allows two-way text messaging, GPS tracking, and SOS emergency signalling from virtually anywhere on the globe via the Iridium satellite network.
The inReach (and similar devices like the SPOT or ZOLEO) give tremendous peace of mind-you can send an SOS to call rescue, or simply update family on your status from deep in the bush. Overlanders consider the inReach a must-have for global adventures, calling it the “gold standard” for reliable coverage worldwide. These devices often pair with your phone for easier texting and and can also provide basic navigation functions.
If your travels are extremely remote or you need voice communication, a satellite phone is another option. Sat phones (using networks like Iridium or Inmarsat) allow voice calls from practically anywhere, though they are expensive to purchase and operate. Some overlanders rent a sat phone for specific expeditions or carry something like the Iridium Go, which acts as a satellite hotspot for messaging and limited data. Another emerging solution is portable satellite internet (like Starlink RV/mobile), which can bring broadband to remote camps-but this is still new, power-hungry, and not yet practical when moving frequently.
Lastly, consider emergency beacons. In Australia, for instance, a Personal Locator Beacon (PLB) is a one-button emergency device that summons search and rescue with your GPS coordinates (similar to an aircraft ELT). It’s a good last-resort lifeline if you have no other comms. Whichever devices you use, make sure you know how to operate them and that they’re properly configured (e.g., subscriptions active, contacts set). It’s also wise to let someone at home know your route and schedule.
With robust communication gear on board, your Defender is not only an adventure machine but also a safety net, ensuring you can call for help or stay connected no matter how far off the grid you roam.
13. Safety and Recovery Gear
Exploring off-road means eventually you’ll face tricky situations - boggy mud, deep sand, mechanical issues, or medical needs far from immediate help. Carrying the right safety and recovery gear in your Defender can turn a potential disaster into a minor hiccup.
Below is a list of must-have recovery equipment and safety items for any well-prepared overland Defender, along with why they’re important:
Winch: A front-mounted winch is invaluable for self-recovery if you get stuck where a tow from another vehicle isn’t possible. Aim for a winch with at least an 8,000-12,000 lb capacity (a common guideline is ~1.5 times the vehicle’s weight). Many Defenders run a 9,500 lb winch on an aftermarket bumper. Synthetic winch rope is preferred nowadays (lighter and safer than steel cable). Don’t forget the accessories—a tree saver strap, snatch block (pulley) for doubling pulling power, and D-shackles or soft shackles to safely attach to recovery points.
Recovery Straps and Shackles: A set of heavy-duty recovery straps is a basic necessity. This includes a snatch strap (kinetic rope) for yanking a stuck vehicle with another vehicle’s momentum, and a tow strap for steady towing. Rated bow shackles or soft shackles are used to connect straps to recovery points. Ensure your Defender has proper recovery points front and rear (reinforced hooks or eyes attached to the chassis) to handle a strap pull.
Traction Boards: Traction boards (like Maxtrax or similar) are plastic boards you can wedge under your tires to gain traction in sand, mud, or snow. They are a lifesaver for solo travellers—you can often get yourself unstuck without needing a tow or winch by digging a bit and using boards under the wheels. Mount them on your roof rack or exterior where they’re quickly accessible. Besides recovery, they can double as levelling blocks or even a makeshift shovel in a pinch.
Jack and Base: Bring an off-road capable jack. The factory jack may not suffice on rough ground. A popular choice for older Defenders is the Hi-Lift jack, which can lift the vehicle by the bumpers or rock sliders and has many uses (lifting, spreading, even winching in emergencies). Caution: Hi-Lifts are dangerous if used improperly—practice beforehand and always use a wide base for stability. The new Defender doesn’t have traditional jacking points for a Hi-Lift, so a better option might be a hydraulic bottle jack or an inflatable exhaust jack for soft surfaces. Whichever jack you carry, also pack a flat base plate to prevent it from sinking into sand or mud.
Shovel: A sturdy shovel is one of the simplest but most useful recovery tools. You’ll need it for digging out sand around stuck tyres, building ramps, or trenching around a wheel. A long-handled steel shovel is best if you have room, otherwise a folding military-style entrenching tool can do the job. Mount the shovel on your roof rack or rear door using brackets, or strap it to your storage system, so it’s handy when you need it.
Air Compressor and Tyre Kit: Tyres are your contact with the ground, so take good care of them. An air compressor lets you air down and air back up as needed. You’ll air down tyres for better traction on sand or rocky trails, then need to inflate to normal pressure for highway driving. A 12V portable compressor that can reach high PSI is essential—mount it under the hood or keep it in the back with an easy-access hose. Along with the compressor, carry a tyre repair kit (plugs, tools, sealant) to fix punctures on the trail. And as mentioned, carry at least one (preferably two in remote regions) spare tyres and know how to change them.
Spare Parts and Tool Kit: Be prepared to be your own mechanic. Bring a comprehensive tool roll with wrenches, sockets, screwdrivers, pliers, electrical tape, zip ties, and specialty tools for your Defender (like a hub nut spanner if you have older Land Rover axles). Include a multimeter for electrical issues. Common spare parts to pack include belts, hoses, hose clamps, engine oil, gear oil, brake fluid, fuses, relays, and critical engine sensors. Older Defenders might carry spare half-shafts or a hub rebuild kit; newer Defenders might at least have some extra fuses and a tyre pressure sensor (TPMS) if those are a known weak point. Pack these in an organised toolbox or bag. It’s better to have it and not need it than be stranded for lack of a small part.
First Aid Kit: Injuries can happen out in the bush, far from immediate medical care. A well-stocked first aid kit is a must. Include bandages, gauze, antiseptic, medical tape, pain relievers, any personal medications, tweezers (for splinters), a snake bite bandage (in snake country), and a first aid manual. Adventure medical kits often come in handy pouches—get one rated for expedition use and supplement it as needed. Keep the first aid kit in an easily reachable spot in the Defender’s cabin.
Fire Extinguisher: Vehicle fires are rare but catastrophic, and campfires can also get out of hand. Have a fire extinguisher on board. A 2-5 lb ABC-rated extinguisher mounted near the driver or in the cargo area is a good choice. Check it periodically to ensure it’s charged. Know how to use it and be mindful of not packing gear in a way that blocks quick access to it.
Lighting and Signalling: Carry at least one good flashlight or headlamp for each person. If you have a breakdown at night, you’ll need light to work. LED headlamps keep your hands free for tasks. Additionally, road flares or reflective triangles are useful if you have to stop on a road to fix something. In remote areas, a signal mirror and whistle are lightweight additions in case you need to attract attention for rescue.
Emergency Beacon: (Optional but recommended especially for solo travellers.) As mentioned in communications, a PLB or satellite SOS device can literally be a lifesaver. If you have an inReach or sat messenger this doubles as your emergency beacon. Otherwise, a standalone PLB is a good investment for worst-case scenarios when you can’t communicate via other means.
By equipping your Defender with the gear above, you dramatically increase your safety margin. The combination of recovery tools and emergency supplies will allow you to handle most problems by yourself—whether it’s pulling the vehicle out of a bog, fixing a mechanical issue on a lonely track, or treating an injury. Overpacking is a temptation, but focus on the truly essential items like those listed (and practice using them ahead of time). With experience, you’ll fine-tune your kit to what you personally need. A well-prepared Defender and an knowledgeable driver make a formidable team, ready for any challenge the wilderness throws their way.